Tuesday, December 14, 2010

Rosemary Olive Oil Bread

I made bread this weekend with my bread machine. I decided to get adventurous and try a new type of bread. We’ve done whole wheat and we’ve done white, but I noticed this time as I was looking through the breadmachine book, that I have the option to do French bread. Also with the reading of the breadmachine book, I discovered some hints and tips that had the potential to transform my bread attempts into something that tasted as spectacular as it smelled.
The recipe was an adaption of the Italian Herb Bread recipe in the breadmachine book (I know bread machine is two words, but it is so much more fun to type it as one, especially when followed by “book”). When I assembled the ingredients, I thought we would be enjoying a lovely piece of red meat and an even lovelier bottle of red wine for dinner, but the Husband was in an unfortunate state from having consumed large quantities of red wine the night before. So we had soup instead, and the bread was still a fantastic addition to the meal.

Rosemary Olive Oil Breadmachine Bread
The instructions for this recipe correspond to the one for my bread machine. I have no idea if they are all the same, so if the instructions for yours differ, please alter accordingly. Also, I used a tiny bit more yeast than it called for, because I wanted a fluffier, lighter texture.

Wet ingredients go in first.
3 tablespoons olive oil
1¼ cup water
Chopped rosemary. I used about 2 tablespoons, and we both decided it could have used more.

Dry ingredients
3½ cups bread flour
1 teaspoon salt
½ teaspoon garlic power

Make a little well in the top of the dry ingredients, careful not to get any wetness into the well. Add the yeast.
2 ½ teaspoons breadmachine yeast

Turn the machine on and let it go to town. Try not to get frightened by the machine when it suddenly starts to knead the dough when you’re standing in front of it with your back to it. Enjoy!

You want pictures, you say? We may have eaten it too fast for pictures. It also makes lovely toast for eggs, and lovely bread to accompany NY strip roast.

Thursday, December 9, 2010

Kitchen Toys

The weather outside is frightful...
If you've been anywhere near my house in the past week, you've probably heard me singing this and various other Christmas songs loudly and very off-key. I love this time of year, and I love Christmas music. Until recently, I didn't celebrate Christmas, and so had very mixed feelings about this time of year. But not the songs. I've always loved them. 

When I met my now husband back when we were in school, he told me wild tales of Christmas and warm fuzzy goodness that was his family. And I was jealous. Big time jealous. It's the one holiday I always wanted to celebrate, but never got to, being Jewish and all. Don't get me wrong, I love my religion, it's history, and my family traditions related to the holidays, but this time of year was always challenging and full of guilt for me. 

As we became closer, and our relationship grew, my exposure to his Christmas also increased. The first time I visited his family (and met them, and saw his house) started on Boxing Day (that's the day after Christmas for all of you non-Canadians out there). When I arrived at the house, I was overwhelmed with the complete immersion into Christmas that I experienced. His mom is an incredible Christmas decorator. The decorations weren't the only thing - there were presents for me. For me! How cool was that?

The next year, I was invited to participate in all of Christmas. All of it! From Christmas Eve all the way through traveling to Canada on Boxing Day for extended Christmas with his extended family. At this point, we had been dating seriously for almost 3 years, and knew we planned to continue our relationship after we graduated (it was, after all, Senior year). That Christmas was my first candlelight Christmas Eve service, my first unable-to-sleep-because-I-was-too-busy-being-excited-and-watching-for-deer-out-of-the-window-in-the-moonlight, my first Christmas morning, my first sticky buns, and my first (and only) white Christmas, which resulted in my first snowman. 

Man, take a Jewish girl from the south and throw her into a Baltimore Christmas, and that is what you get.

As the years have gone by, my Christmas experiences have progressed from that tingle of excitement that kept me up most of my first Christmas Eve to excitement over spending a relaxing few days with family I see not nearly enough anymore. Moving down to Austin has just a little bit to do with that. Last year, for the first time, I participated in Christmas in a new way, a behind-the-scenes sort of way that involved stockings. I'll leave it at that.

It's my 9th Christmas this year, the third year we've had a full-sized tree at home (something I always wanted but swore I would never do), and the third year we're spending the holiday itself at the Husband's brother's house, complete with his wife, their daughter, my mother-in-law, and her giant yellow Lab, Max. And I cannot wait. 

(Here comes the guilt again, it's Chanukah now, and I feel like I should be writing about the beauty of the lights, or the joy of sharing my family traditions with the Husband. But that's not what this post is about. There will be another one about Chanukah.)

Anyway, the purpose of this post was to discuss some of my favorite kitchen toys, in case you're in need of gift ideas, or need padding for your own wish list. 

1. Kitchenaid mixer. We do so many things with it (and with attachments). Ice cream, ground beef, and pasta, to name a few things. We occasionally use the food processor attachment.


2. Spatulas. I use them for everything, even making eggs, and have a variety of sizes and shapes. These are particularly cute and festive.
Mini Holiday Spatulas, Set of 3

3. A good knife. We did just update our knife block for one with more slots, but all you really need for most tasks is one really good knife.


4. A kitchen scale. Ours weighs in 4 different weights. Indispensable tool. Just don't let it jump off of the top of the refrigerator, because it most likely will stop working at that point.

Friday, December 3, 2010

Thanksgiving 3

And finally (I know, a week later) we get to the food.
The day was lovely, the food all came out wonderfully, and we were mostly relaxed. I say mostly because out of the 5 of us (me, the Husband, his mom, and my folks), 3 of us spent the morning increasingly anxious about when the turkey needed to go into the oven. Guess which three.

Every time one of us would go from the kitchen to the living room, we would ask the dear Husband if he knew when the turkey was to go in. It went something like this:
Me: When should the turkey go in?
Husband: I don't know yet, I'll let you know when I look it up.
Me: Please do it soon.
(I walk back in the kitchen and exchange eye rolls and general moaning about boys with the moms)

5 minutes later, in the living room
My mom: Have you looked up the turkey time yet?
The Husband: Not yet. I will soon.
My mom: Ok.
(She walks back into the kitchen, to the same reactions from us as I received moments before.)

10 minutes later, in the living room
Me: Husband, I am getting nervous. Please look up the turkey time NOW.
Him: Lay off. I'll let you know when I do, and it will be fine.
Me: It's more important than your fantasty football. You're losing this season anyway. Look it up now and we'll all leave you alone.
Him: I'll do it when I damn well please. Get back in the kitchen where you belong, woman.

It got to the point where each time one of us would open our mouths in that room, my dad would already be laughing. Aside from that minor stress-inducing incident, the day passed very smoothly, ending with a lovely meal of Thanksgiving-y goodness.

Mom's Corn Casserole
Ingredients
1/2 cup butter, melted
1 can cream-style corn (14-15 oz)
1 can corn kernels (11-14 oz)
1 1/2 cup grated cheese (I've used cheddar, Colby jack, and jalapeƱo jack at different times)
8 oz sour cream
1 box Jiffy corn muffin mix (8 oz)

Method
Preheat oven to 350. Melt butter in a large bowl. Add corns, 1 cup grated cheese, sour cream, and muffin mix. Stir to blend. Pour into a greased 7x11 baking dish or a round casserole dish. Bake for 45 minutes or until golden brown. Sprinkle remaining cheese on top and bake for 10 minutes or until the cheese melts. Let stand for at least 5 minutes. Serve warm.

Thursday, November 25, 2010

Thanksgiving, Part 2

There are many things to be thankful for this year, all right here at home.


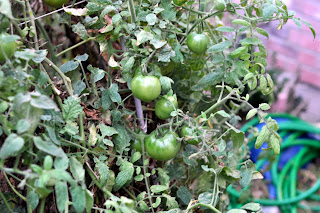
Our tomatoes have taken off the past few months. There are probably around one hundred fruits on the plant.


And peppers. Lots of peppers that, somehow, the deer  have not managed to decimate this year.

Eggplant, herbs, and so much more.

I am very thankful we are in a place where we can have a vegetable garden.


But - the weather - we're supposed to get our first real freeze tonight. So we'll probably have to say goodbye to the garden for the year.


There may be pickled tomatoes in my future. And fried green ones. Lots, because as you can see, we're not ready for a freeze! Despite the worries, it's nice to have such a garden for which to be thankful. Some of our treasures are treasures in part for the reason they sometimes bring us grief, or fear, or worries. We get that much more joy out of them and we're that much more invested in them. (And it makes me feel all grown up and proud. You would think hosting Thanksgiving for the fourth year in a row would do it. But no, it's worrying about my plants that did it.)

Happy Thanksgiving! I'm off to the turkey trot with the family.

Tuesday, November 23, 2010

Thanksgiving

It's the 4th annual Davey Thanksgiving Extravaganza....

A little history:
Year 1: cooking for 7 in a tiny Austin apartment. Generally a success, despite such tight quarters. We used all new recipes, an adventure for us since we never hosted Thanksgiving before.
Highlights included Cornbread Dressing with Roasted Fall Vegetables, Cranberry Cornmeal Quick Bread, my mom's corn casserole (recipe later), and a roasted garlic-cauliflower soup.
Year 2: cooking for 12 in our new house. Such a difference in space. Equally a success. We used a lot of the same recipes from the year before, and added a few new ones, like poached pears and pumpkin creme brulee, and, in a nod to the Husband's Canadian roots, Smashed Rutabagas with Ginger Pears.
Year 3: cooking for 12 (not quite the same 12 as the year before). It was still generally a success, despite too-salty gravy because we salted the turkey. We added a cranberry sorbet and an amuse bouche of butternut squash ravioli (all handmade) with sage butter sauce. The Herb and Cheese Poppers as a mid-day snack were a huge hit.

And this year.
Year 4: Still discovering lists and menus from the previous years in the November issues of cooking magazines. I am much more relaxed than previous years, in part because the number of eaters at my table has dropped to 5. The menu this year features a lovely heritage turkey, the Husband's mom's stuffing, my mom's corn casserole, gold and sweet potato gratin, braised spinach, butternut squash ravioli with walnut-cream sauce, roasted root vegetables, carrot cake, my mom's pecan and fudge pie, Goode Co pecan pie, and an apple/pear salad. Oh, and multi-grain rolls and mini corn muffins. Not in that order, of course.

Unlike previous years, I have not written out a detailed timeline for Thursday yet. And it's Tuesday afternoon. I do know that tonight I will be baking. Carrot Cake, cranberry walnut scones, and corn casserole (for a pot-luck at work tomorrow) are on the list for tonight. I also know that tomorrow the Husband will make the pasta for the ravioli and go to the store for any last minute ingredients, including lettuce and other such delicate perishables, while our mothers enjoy a day of shopping at the San Marcos outlet malls and I try to make the time pass quickly at work. I know when I come home I'll prepare the dough for the rolls, and set it to rise.
I am not concerned about the schedule for the big day, and I'm trying to figure out why. I know the day will progress smoothly with a schedule, but I still haven't put one together. Am I that confident in our cooking abilities this year? Am I more relaxed because there are fewer guests? Have we done this Thanksgiving thing enough to have it down? Will I have a minor spaz tomorrow afternoon and quickly write up a timetable, only to discover I'm still missing some key ingredients (impossible, because the grocery list making process was ridiculous, but still)?

I guess I'll have my answer in two days. You'll get the full report, don't worry. You'll also get (hopefully) lovely photographs of our meal, with brilliant (ha) descriptions and reviews of each dish.

In the meantime, what are your plans? Are you hosting? Are you bringing your favorite dish to someone else's? More importantly, what are you cooking, or, if you're not cooking, what are you eating?

Monday, October 18, 2010

Pyramids

Another interesting find from good.is:
Dual Food Pyramids: "To help people select foods that contribute to a Balanced Diet from the Nutritional viewpoint but that are also Sustainable for the Environment, we have developed the Double Pyramid."
Click on the image for more information. (You may have to click the top button to translate the page to English.)
food-pyramid


And I promise to post more recipes and pictures soon. I have about ten just waiting to get published.

Friday, October 15, 2010

Local Food?

It's hard, as a lover of food, to ignore the many issues in the food world today. Everyone has an opinion, and every issue has a study backing it. For some reason, it seems there is more and more press on food-related things now, and lately in particular. It probably doesn't help that I am reading Best Food Writing 2010 (and highly recommend it), since many of the issues discussed today are topics of the essays presented in the book. The point of this post is mainly to recommend the book, and not to delve into the arguments behind the many reasons to or not to eat something, but I do have a few thoughts about an article I just read.

Walmart Goes Local, on good.is
My first thought was, WTF? Doesn't the concept of local goods, unique to the town, region, or state, go against everything Walmart, as a national retailer, has done to the average consumer? I ran through several discussion points in my head, but then I realized what was actually bothering me about this particular issue. It is not that the concept of local is contradictory to the economies of scale that supports Walmart. It's not that people shopping for produce at Walmart may have other priorities than local production. It's also not the concern that local farmers may not be able to compete with prices. And it's beyond wondering if it all is a publicity stunt, or an attempt to lure new shoppers into the store.

Should Walmart be spending money on local produce programs when they offer no benefits and very low wages to the majority of their employees? I know it's not a sexy or trendy issue, like local produce, but it is a very real problem. Walmart, in it's position as gigantic retailer and employer, has the ability to make widespread changes to retail jobs across the country. This issue concerns me greatly, and until they make changes in the direction of a living wage or basic benefits to employees, I cannot be impressed by other things, like this local food thing, that they will do.

What do you think? Will Walmart be successful in their support of local farmers? Should they address the issues within their company before attempting to reach out? Do you eat local food? Do you have any particular food-related shopping habits like buying local, eating seasonally, or anything else?

Monday, September 27, 2010

Foodie Friday Favorite - Buffalo Meatloaf with Spinach and Fingerling Potatoes

Adapted from Bon Appetit.
This recipe was my first attempt at meatloaf, about 3 years ago. We were living in a tiny apartment in Austin, and had a very old (and not in a good way) oven/stove combo. As a newlywed, It was important to me to learn how to cook some of my husband’s favorite dishes. Not wanting to compete with my new mother-in-law and her meatloaf, I thought the ground bison in this recipe would set it apart as a different meatloaf, yet still capture the intention. It was months later when I learned the seemingly obvious fact that it didn’t matter how different (or similar) the recipe was. It wasn’t the same, and it wasn’t made by the Husband’s mom. We have come to enjoy this meatloaf and to me it symbolizes the next level in our cooking abilities and experimentation that took place shortly after we got married. (The recipe also happened to appear in the first issue of Bon AppĆ©tit that we purchased, to read on a camping trip where we watched the Persied Meteor shower. Coincidence? Probably not, since that one magazine led to our subscription…)

When I made the recipe the other night, I thought about how far our cooking has come in these three years. I love using ground bison and usually get at least two pounds whenever I pick some up. It’s a great healthy substitute for ground beef, and has sweeter flavor notes.

The beauty of this recipe is that it is a full, balanced meal. It does have a fair amount of cooking time, so on a weeknight start the potatoes as soon as you get home, and then do the other prep.


Ingredients
1 pound fingerling potatoes (or baby Yukon gold, if fingerlings are not available)
5 teaspoons olive oil, or more, as needed
1½ cups chopped crimini mushrooms (also called baby bella)
1 cup chopped onion (red onion gives the most flavor, but use whatever you have on hand)
1 tablespoon chopped fresh sage
1 tablespoon chopped fresh thyme
1 tablespoon chopped fresh Italian parsley
1 pound ground buffalo meat (Central Market and Whole Foods have ground bison in the meat case, and other grocers have pre-packaged ground bison in the meat section)
1 large egg
½ cup Panko (Japanese breadcrumbs, also now available in non-Asian sections of the store)
½ teaspoon salt
½ teaspoon fresh ground black pepper
¼ teaspoon (more or less as preferred) crushed red pepper flakes
1 garlic clove, diced
10 to 15 ounces fresh spinach

Procedure
Preheat the oven to 375°F. Toss the potatoes in the olive oil. Place the potatoes on a rimmed baking sheet and bake for 20 minutes.Meanwhile, prepare the meatloaf. Heat 2 teaspoons of oil in a large skillet over medium heat. SautĆ© the mushrooms and onion until mushrooms are beginning to brown and onion is slightly translucent. Remove the skillet from the heat and mix in the herbs. Cool the mixture slightly.In a large bowl, gently mix together the buffalo, mushroom mixture, egg, panko, salt, and pepper. At this point, the 20 minutes for the potatoes should be over. Remove the potatoes from the oven and push them to the sides of the pan. Shape the meat mixture into a loaf-like shape in the center of the pan. 6 inches long by two to three inches tall works the best. Roast the meatloaf and potatoes for 30 minutes.Prepare the sauce. Combine the tomato sauce and red pepper flakes in a small bowl. After the 30 minutes have passed, pour the sauce over the meatloaf. Roast for 20 minutes more.
Once the meatloaf comes out of the oven, let it rest while you prepare the spinach.  Heat the remaining oil and garlic in a large pot over medium-high heat. Add the spinach and toss to wilt. If you prefer your spinach a little more done, cover the pot and steam the spinach for two to four minutes.
Slice meatloaf and serve alongside potatoes and spinach. Serves 6, and the leftovers are excellent. 

Tuesday, September 21, 2010

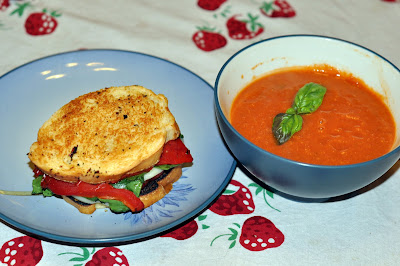
Roasted Red Pepper and Fontina Grilled Cheese and Tomato-Lentil Soup.

Roasted Red Pepper and Fontina Grilled Cheese and Tomato-Lentil Soup.
A portion of the soup is left over from the Yom Kippur dinner we shared with my folks this weekend. The lentils add a warm, slightly nutty flavor to my basic vegetable soup, and had a texture similar to butternut squash bisque. For dinner tonight, we’re using the lentil soup but adding some tomatoes, to make it more consistent with the tomato soup/grilled cheese comfort food of the Husband’s childhood.

Roasted Red Pepper and Fontina Grilled Cheese
Ingredients
4 slices country bread
2 to 4 slices tomatoes, marinated in olive oil, 2T fresh basil, 2T fresh oregano, and salt and pepper for 30 minutes
Fontina cheese
Roasted red pepper, one whole, sliced in half (Easiest way to roast a red pepper is in the toaster oven. If you don’t have one, or if you are unfortunate and like us, have a nice one that no longer works, the second easiest way is on the grill, if you have a gas grill. Otherwise, stick it in a hot oven. Once the pepper is roasted, seal it in a zip-lock bag until it cools, about 20 minutes. Remove it from the bag and peel the skin. The skin will come off easily at this point. Slice it in half, clean out the seeds, and you’re all set.)
Wilted leaf spinach, enough to cover slice of bread
Dried crushed red pepper flakes
Optional: pancetta, prosciutto, thinly sliced leftover roast beef

Procedure
Marinate tomatoes. Preheat oven to 400°F. Lightly toast bread in pan on one side. Lightly butter untoasted side of each bread slice. Place 2 bread slices, buttered side down, on work surface. Top each with 2 meat slices, if using, then spinach leaves, then red pepper slices, then 4 cheese slices. Sprinkle with salt and crushed red pepper. Top with remaining 2 bread slices, buttered side up. Heat olive oil in heavy large ovenproof skillet over medium-high heat. Add sandwiches to skillet and cook until golden on bottom, about 4 minutes. Turn sandwiches over; transfer skillet to oven and bake until golden and cheese melts, about 5 minutes. Remove from oven. Carefully lift off top bread slices from sandwiches and insert tomato slices into each, then cover with bread tops and serve.


Tomato-Lentil Soup
Ingredients
Make Lentil Soup, see recipe below. (If making Tomato-Lentil soup on the first go, add additional tomatoes when adding the first can, then add the cream towards the end of the cooking process.)
2 14 oz cans diced tomatoes
2T cream
Fresh basil, for garnish

Procedure
To turn the leftover lentil soup into tomato-lentil soup, we reheated the leftovers in a pot and added another can of diced tomatoes. We also added cream and used the immersion blender to blend until almost smooth. Serve in warmed bowls with sliced basil on top.


Vegetable Lentil Soup
Ingredients
1 onion, cut into rough ¼” pieces (or whatever size you prefer for soup)
3 or 4 carrots, cut
3 or 4 celery stalks, cut
The leafy inside part of the celery bunch, chopped
1 leek, chopped (we used the lower half of the leek)
1 garlic clove, chopped into very small pieces
2 quarts vegetable broth, and maybe more for thinning as the soup cooks
2 cups red lentils (or lentils of your choosing)
1 14oz can diced tomatoes
Fresh herbs (we used parsley, basil, oregano, tarragon)
Salt and pepper to taste

Procedure
Sautee onion, carrot, celery, celery leaves, and leeks in olive oil until crisp-tender over medium to medium high heat. Add garlic, cook for a few minutes until fragrant. Add broth, bring to a boil and reduce heat, simmering vegetables for 10-15 minutes. Add lentils, tomatoes, and herbs and cook for 30 minutes or until lentils are soft. At this point, you can leave the soup as it is, or you can blend some or all of it. I used the immersion blender until about half of the soup was smooth, with some vegetables remaining in larger pieces. Add broth to thin if needed. Salt and pepper to taste, or allow each diner to salt and pepper individually (whenever we cook and my mother is one of the recipients, we always leave out the salt and pepper and let each person add their own).

Fall?


It’s fall. Maybe it’s not technically fall, but school has started and temperatures at night here are hitting the upper 60’s. We had the windows open last night, at least until I realized the humidity was defeating the purpose of the cool temps and the house was actually getting hotter. Fall means apples, soups, squashes, and savory flavors. It means more food cooked in the oven than on the grill (though we do grill year-round). It means football and chili, and wishes every week for our games to be broadcasted at home so things like chili can be made while the game is on. It means cooking dinner as it gets dark outside, instead of finishing dinner then sitting on the porch as the sun sets. It means the return of favorite cooler-weather meals, like the chicken pot pie we had last week for the first time in months.

(I just did a search, and it turns out that fall does officially start this week, on Wednesday, so this post isn’t too far off. I think I felt that way because in my mind, it is hard to believe it is 2010, let alone nearing the end of September.)


And no, the leaves do not look like the picture above here yet. And may never. We tend to go from the brown of summer to the green of early fall to the brown of winter. This is much closer to what fall looks like here.


Part of fall for us this year means time to save a little more money than usual. The summer of weddings and travel has exhausted us, and not just physically.


A substantial portion of 


our budget goes towards food. Therefore, saving money means making meals using as many things as are already in the kitchen as possible. I’m not good at planning meals this way. Part of my favorite part of the week is planning the menu, then grocery shopping for the ingredients we don’t have, with little regard for whatever we might already have. Saturday mornings are spent pouring over magazines and cookbooks, discussing recipes and pairings, and generally having a lovely breakfast filled with thoughts of other meals. Sadly, such dreaming will have to change for awhile. The meal planning for this month will involve a careful study and consideration of foods already in the pantry, fridge, and freezer (and there’s a lot of it). New creativity will come not with selecting recipes (or inventing recipes) to complement one another, but with combining ingredients in ways that minimize the weekly shopping list.


Pantry meal #1, dinner last night (and a post shortly), came from a little online searching with certain ingredients in mind, and then some tweaking of several recipes I encountered in my searching. It's Roasted Red Pepper and Fontina Grilled Cheese with Tomato-Lentil Soup.

Sunday, August 15, 2010

Pizza

It was a very relaxing and restful weekend. Stay tuned this week for beef fajitas, Greek salad, and orecchiette with mozzarella pearls. All three will feature produce from our garden.

Dinner tonight: Margherita pizza and Pugliese pizza from Mandola's. We're big fans.

Wednesday, August 4, 2010

Summer fun, and yummy steak

Garden! Watermelons are getting bigger, peppers are actually starting to change color on the plants, and tomatoes and cucumbers continue to produce. Our tomatillo plants are going crazy – we’re just starting to see fruits on them. Herbs continue to please, and our poor grapes are recovering slowly from the deer munch fest a couple of months ago. Until this week, temperatures have been relatively mild (at least, mild from a Texas summer standpoint) but we are now seeing those 100 degree days and no rain, which will dry everything out and slow or stop production on most plants. However, I am not complaining, by this time last year we had almost 50 days over 100 degree or hotter weather, so this year has been substantially better for the garden.

Meanwhile, the summer continues to progress! We have discovered a new way to cook steak, courtesy of Gordon Ramsay (video on YouTube). All I can say is YUM. No pictures, but last night we used an herb butter on the nice rib-eyes from HEB instead of plain butter that Ramsay calls for, and it was fantastic.
Mix with ½ stick butter: 1 T chopped fresh parsley (Italian, from the garden), 1T chopped fresh chives, and 1 clove pressed garlic. Add the herb butter as instructed in the video, when it calls for plain butter.
We served this delicious piece of meat with steamed broccolini and garlic smashed potatoes.

Garlic Smashed Potatoes
Boil 2 potatoes (or however many people you want to feed) with 5 peeled gently crushed cloves of garlic until potatoes are soft. Remove from heat, let potatoes remain in the garlic water for a few minutes. Move the potatoes to an oven-safe dish. Gently push down on the tops of the potatoes until lightly smashed, enough so that toppings will seep inside. Drizzle the potatoes with a bit of olive oil and lay a pad of butter on top of each one. Salt and pepper. Broil for 10 minutes or so until the tops are crispy. Top with a small spoonful of crĆØme fraiche and a sprinkle of chopped fresh chives.

Tuesday, July 13, 2010

Dismal Summer Bloggie


(Yum, slow cooked beef tacos. Even though you can't see the beef.)

And yes, this dock had something to do with it.


It also might have something to do with the enormous amount of work I have to do, at, well, at work, which renders me useless and exhausted every evening, or the multiple weddings and vacations occupying the weekends (we're in St. Louis this weekend), so that free weekends mean house cleaning, laundry, yard and garden work, and generally not doing too much else.
However, we have still been cooking, and taking pictures, so it's all a matter of time before I select the best recipes and have a "best of summer" post. Or several.
Highlights to look forward to include a Canadian chicken wing cook-off,


piri-piri chicken,


our garden's progress (huge, because of the two tropical storms of late), and I'm sure many more things that I will remember once I see the pictures. Like sunrise over Georgian Bay, courtesy of the Husband.


So please, folks, bear with me, and know that more is in the works (or already happened, but actually posting it is in the works).

Wednesday, June 9, 2010

Dinner tonight!

Stay tuned: Grilled Asian Chicken with Bok Choy, Shiitake Mushrooms, and Radishes (from our garden)
with Mango-Sesame Dressing

Grilled Asian Chicken with Bok Choy, Shiitake Mushrooms, and Radishes (photo from Bon Appetit)

Saturday, May 29, 2010

Spring Garden

The spring garden is coming along quite well. We have tomatoes with fruits, broccoli, cucumber plants climbing the trellises, radishes poking up, eggplant and more tomatoes in the ground, bell peppers and spicy peppers, strawberries, a few stalks of corn, carrots, and a little watermelon plant. In the back garden we have our two grapes and many herbs. The garlic harvest was very successful, but the drying process was slightly interrupted by the torrential downpour of the other evening. It should be fine.

The broccoli is suffering from inchworm infestation. We cleared the first round of them from the plants but missed some eggs, so a second round of removal took place. We'll see how they do. I have a feeling it might be too hot for much more good production from them.

Thursday, May 27, 2010

Dinner tonight!

Soup soup soup. It's getting so close to summer, my nights of having soup and having the Husband agree that soup is reasonable are rapidly decreasing in number. As a welcome to summer, and in appreciation of the yummy summertime vegetables now available, tonight we enjoyed our take on this soup:


The Husband absolutely loved this soup. He has multiple helpings. I did too, but that's nothing new for me. The soup itself is very flavorful and the vegetables simmer into loveliness, and the pesto gives it a kick and boost. It serves 6 as a starter or 4 as a main course.

2 slices bacon (omit bacon for vegetarian, use olive oil instead)
1 large onion, chopped
2 large garlic cloves, minced
1 leek, chopped (I use the white parts and the soft green parts)
3 carrots, chopped
2 celery ribs, chopped
1 zucchini, chopped
1 potato, peeled and chopped
4-6 cups vegetable or chicken stock
1 28 ounce can of San Marzano tomatoes with juice
1 cup finely chopped leafy green, like spinach, kale, chard, etc
1 9 oz package of tortellini
store-bought pesto, or make your own
Parmesan cheese for garnish

Chop the bacon into little pieces. Cook in the soup pot until crispy. Add onion, garlic, and leek, and cook, stirring occasionally until tender and starting to brown. Add carrots, celery, zucchini, and potato, and stir for a few minutes. Add broth, start with 4 cups and add more later if needed. Add tomatoes, breaking tomatoes up with the back of the spoon. Let the soup cook for 30 to 45 minutes so the flavors blend. Taste, and add salt and pepper as needed. Add leafy green and tortellini and cook until tortellini is cooked. Serve, with pesto and cheese as a garnish.

Thursday, May 20, 2010

Insanity

On an unrelated note (unrelated to food, that is) I have signed up to run the half marathon (yes, that's 13.1 miles, 10 miles further than I have ever run at one time) in November in San Antonio. So far, the planning and preparation to run has been more fun than the actual running. Mapmyrun.com and I are good friends. However, since this is Texas and it is May, the majority of the training will now take place inside, with air conditioning, on my grandparents' treadmill. Weekends I may be able to put in some miles outside, especially if I get up early, for the next month or so, and then again in October. For those of you unfamiliar with a central Texas summer, and maybe thinking that I'm crazy and I can keep running outside if I get up earlier or run at night, such things may be possible but definitely very uncomfortable. Come summertime, I will be very lucky if it drops below 85 degrees before 10:00 at night. Likewise, if it is below that same temperature when I leave for work at 7:15, it will make for a very pleasant morning. So, in summary, Texas is hot during the summer. (I know, duh.)
My current running ability is in the Couch to 5K Week 3 range. So I am building back up SLOWLY. But it also means anyone can do it with me at this point, because I am a beginner. Beginner beginner.

Anyone want to join me in San Antonio in November?

(I was originally planning to run one in February in New Orleans but a training knee injury prevented that from happening.)

Monday, May 3, 2010

Not sick anymore

But the husband is. However, I will make up for the complete lack of posts last week with extras this week, I promise. It was a tough week where I didn't feel like doing anything, and actually missed work for awhile. All better now, and busy taking care of the husband. His dinner request last night was for Kraft dinner and hot dogs. I added some sliced tomatoes and mozzarella, and we had a lovely meal out under the trees in our backyard.


This was taken awhile ago, back when it was still dark outside around 6:00 pm. I have a series of them (I had to sit a lot because of a knee injury), all of the husband doing various things around the kitchen. Judging by the ingredients and equipment on the counter, I believe we were making meatballs.

Monday, April 26, 2010

Dinner tonight

We made Classic Sole Meuniere a few weeks ago (apparently I mentioned it here in one of my longer posts but never wrote about it), in part because of this article (a little motivation never hurts). A nice sale on Sole at the store last night prompted another purchase, so we will be enjoying it again tonight. It was quite good when we had it before.
I'll update later tonight with pictures and more.

Mastering the Art of <em>Sole Meuni

Roasted Grape Tomato Sauce

We made this recipe a number of times last fall, after it cooled off enough for our grape tomato plants to really start producing. We're hoping for a slightly cooler summer, so maybe we'll have tomatoes all summer instead of spring and fall. It's a fairly easy recipe, with not a lot of time in the kitchen. It's modified from a Bon Appetit recipe, and I was going to link to it, but I realized the modifications we made this time stray a little too far from the original recipe. It may be the subject of another post in the future, because we do enjoy it so much.

First, preheat the oven to 375. Slice tomatoes and add them, with olive oil, balsamic, red pepper flakes, garlic, basil, and oregano to a glass baking dish.


Roast the tomato mixture for 45 minutes or so, stirring occasionally, until the tomatoes are very tender.
Cook the pasta in boiling water until tender but still firm to the bite. Drain the pasta and return it to the pot. Add the tomato mixture and stir over medium heat until heated. Add cheese and stir until melted. Serve, adding a fresh basil garnish if you so desire.


Ingredients (for two servings and leftovers)
1 1/2 pounds grape tomatoes (or cherry)
1/3 cup olive oil
4 large garlic cloves, chopped
1 T balsamic vinegar
1/4 t crushed red pepper
3 T chopped fresh basil
3 T chopped fresh oregano
1/2 pound pasta of your choice
3 ounces fresh mozzarella, grated
extra basil and olive oil for garnish

Directions
Preheat the oven to 375. Slice the tomatoes in half, and combine them in a glass baking dish with the olive oil, balsamic, garlic, red pepper, basil, and oregano. Roast in the oven for 45 minutes or until tomatoes become nice and soft. Stir occasionally. Remove the tomatoes from the oven and set aside.
Cook pasta in boiling water until almost done. Drain the pasta and return it to the pot, along with the tomato mixture. Reheat over medium heat until heated, then add the cheese and stir until the cheese is melted. The cheese will be very stringy.
Serve with a basil garnish and a light drizzle of olive oil, if desired. It pairs nicely with a green salad.

Sunday, April 25, 2010

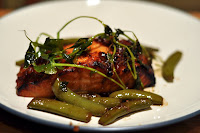
Salmon with Sweet Chili Glaze

Bon Appetit April 2010 Cover recipe.
Salmon with Sweet Chili Glaze, Sugar Snap Peas, and Pea Tendrils BA's picture.


Our attempt.


The recipe was easy to make and good. We served it with rice. Our pea tendrils were more mature than the intention (so they were woody) and we ended up placing them to the side. Other than that, a success, and we'll add it to our ways to prepare salmon.
Note: I am not including stirring times in the stove-top portion of this recipe because I find them to be inaccurate on my electric stove. Sadly, gas is not available in my house.

Ingredients
vegetable oil spray
1/4 cup Asian sweet chili sauce (Asian aisle)
3 T soy sauce, divided
2 T finely grated fresh peeled ginger, divided
6 6-ounce salmon fillets with skin
2 T vegetable oil
3 garlic cloves, minced
8 ounces sugar snap peas
1 1/2 T Chinese rice wine or dry Sherry
3 cups pea tendrils or pea sprouts (6 ounces)
1 t Asian sesame oil

Prep
Line a rimmed baking sheet with foil and spray it with cooking spray. Place salmon on the baking sheet, skin side down, with a bit of room between each fillet. Combine chili sauce, 2 T soy sauce, and 1 T ginger in a small bowl, whisk, and spoon sauce over the salmon. Let it stand at room temperature for 30 minutes.
Preheat the broiler. Spoon any remaining sauce from the baking sheet back onto the salmon. Broil the salmon for 6 to 10 minutes or until desired doneness.
Meanwhile, heat the vegetable oil in a wok or large skillet over medium high heat. Add the remaining ginger and garlic and stir until aromatic. Add the sugar snap peas and stir until crisp-tender. Add the remaining soy sauce, the rice wine, and pea tendrils and stir until the tendrils are just wilted. Drizzle the pan with sesame oil.
Serve the salmon on plates with the pea mixture over the tops.

Migas Casserole

The husband was still asleep. I started making breakfast, and mid-way through the bacon cooking I realized I wanted migas, but didn't want to have to cook after he got up. I wanted everything to be ready by then. Migas became migas casserole, and it stayed nice and warm in the oven until he woke up. Serve it with fresh fruit.


Migas Casserole
2 strips of bacon (optional - if not using, use olive oil to crisp the tortillas instead)
2 corn tortillas
1/2 red bell pepper, cut into 1/2 to 1/4 inch pieces
1/2 cup chopped onion
5 eggs
1/4 cup cream
1 cup grated cheese of your choice (used cheddar and Cojita)
fresh ground pepper

Preheat the oven to 375.
Cook bacon. Drain on paper towels. Tear corn tortillas into bite sized pieces. In the same pan, with bacon grease that remains (or olive oil if you choose), cook corn tortilla pieces until crisp, stirring occasionally (for me, that means I stir almost constantly thinking that the more or faster I stir, the sooner the food will be done). Drain tortillas pieces on the paper towel with the bacon. When the bacon is cool enough to handle, break it into small pieces.
In the same pan, add the onion and red bell pepper and cook until onions are almost translucent and peppers are tender. Scrape the pan to remove browned bits. Remove from heat. Add the bacon and tortillas back to the pan and stir to combine.
Prepare the eggs. Whisk the eggs with the cream. Add pepper to taste (but don't taste the raw eggs, just guess).
Grease a small casserole dish. Place about half of the onion/bacon/tortilla mixture in the bottom of the dish. Pour half of the egg mixture over it, and top with half the cheese. Repeat.
Cook on the middle rack of the oven for 45 to 50 minutes until the eggs are firm. Let it cool for about 5 minutes. Serve with chopped tomato, cilantro, avocado, and anything else you want (black beans, salsa, and so on).

Foodie Friday Favs - BLTs with a twist

These are really more like PATs, with pancetta, arugula, and heirloom tomato (in season). The original recipe also calls for burrata, which I have yet to find in Central Market (can find EVERYTHING there) or any other place I've looked in the area. Instead, we use fresh mozzarella. This is a great summer meal, served with a salad, because it can be served room temperature, requires little time in a hot kitchen, and shows off those summertime tomatoes. We recently found a tomato that almost tastes like summer, so I decided to use part of it in this recipe.

Ingredients
pancetta - 2 thick slices or 4 thin slices per sandwich
tomato slices - use a red heirloom
1/2 cup torn fresh basil leaves (use fresh, makes such a difference)
6 tablespoons extra virgin olive oil
2 teaspoons dried oregano (dried is ok here)
1/2 teaspoon fleur de sel or coarse kosher salt
freshly ground black pepper to taste
slices of bread, enough for as many sandwiches you want to make
2 ounces of cheese per sandwich, burrata recommended, fresh mozzarella is an ok substitute
1/2 to 1 cup baby arugula or other fresh small greens


First, cook the pancetta as you would cook bacon.

We've tried it several ways, and thick slices of pancetta work the best. You can find it at an Italian market or a specialty grocer. I even found it in small town grocery store. Once it is cooked, drain it on paper towels and set it aside.


Meanwhile, marinade your tomatoes.

Slice the tomatoes to desired thickness and lay flat in a shallow pan. Add the oil, basil, salt, pepper, and oregano, and flip the tomatoes to make sure they are completely coated. Let them sit in the oil mixture at least 30 minutes and longer if you get busy in the garden or outside and lose track of time.


Assemble your bread. We've used ciabatta, potato bread, challah, Safeway bread (French loaf), and others. All of it is good, with the slightly more substantial breads standing up to the sandwich a little better. Thick slices of challah may be my favorite so far. Toast the bread slices to desired level of toastiness. Slice the mozzarella (or burrata if you're lucky enough to locate some) and spread it on one side of the sandwiches. Top the cheese with one tomato slice each, then with pancetta and arugula. Press the tops of the sandwiches lightly down. Sometimes we use a little less cheese on the first slice of bread in order to use some on the upper slice - it helps with sandwich integrity. Cut each sandwich in half and serve.


Wednesday, April 21, 2010

Tuesday Treats - An Almost Disaster

Last night I made this cake. I wish I had pictures of the kitchen. From the state of things, it appeared that I had never baked before, and that I was a complete mess when it came to doing anything in the kitchen. There were dry ingredients everywhere (everywhere!), on the counters, on the floor, on the dog - she was almost white at one point - and all over me. I was spilling everything, from cake flour (both before and after sifting) and cocoa powder to dropping eggs (at least one) on the floor. I also added powder instead of soda, then removed the powder, only to discover I needed it as well. Disaster, and ridiculously messy kitchen to clean up at around 10:00 last night. Groan. But the cakes baked just fine, and were nice and fluffy once they cooled.
Frosting the cake this morning was equally as challenging. It's a very tasty frosting, but between the hardness of the frosting and the softness of the cakes, I had lots of difficulties and in several places removed the top layer of the cake.

Anyway, here is the recipe (adapted from Bon Appetit)
Chocolate Cake with Caramel-Milk Chocolate Frosting

Frosting
24 ounces milk chocolate, finely chopped (I used milk chocolate chips and did not finely chop them)
3 ounces bittersweet chocolate
1 1/2 cups sugar
1/2 cup water
2 1/4 whipping cream

Combine chocolates in large bowl. Combine water and sugar in saucepan and make caramel, stir sugar into water over medium heat until dissolved, then swirl pan and brush down sides until mixture darkens and turns golden. Add the whipping cream SLOWLY (it will boil and fizz A LOT) and then stir until the caramel dissolves (it will take some time and it's hard to do). Once it is all nicely dissolved, pour the caramel cream over the chocolate and stir the chocolate mixture until the chocolate is all dissolved and the mixture is very smooth. At this point, you can either chill it in the refrigerator or you can let it sit out at room temperature if you plan to frost the cakes as soon as the cake portions cool.

Cake
Nonstick vegetable oil spray and parchment paper
2 cups sifted cake flour (sift, then measure)
1 cup unsweetened cocoa powder
1 1/4 teaspoons baking soda
1/2 teaspoon baking powder
3/4 teaspoon salt
1 1/2 cups golden brown sugar (packed)
1 cup plus 2 T room temperature butter
3 large eggs (more if you drop one on the floor)
1 T vanilla
1 cup plus 2 T buttermilk
1/2 cup lukewarm water
1 cup semisweet chocolate chips

First, preheat the oven to 350 and prepare your pans. You will need between 2 and 3 springform cake pans. I used 2, the original recipe calls for 3. Spray pans with cooking spray, then cut parchment paper circles and line the bottom of each pan with one circle. Set them aside.
Sift and measure the flour into a medium bowl. Add the rest of the dry ingredients (through the salt) to the flour. In the mixing bowl, combine the brown sugar and butter and beat until smooth and fluffy. Add eggs, one at a time, beating well to combine between each addition. Add a third of the flour mixture, then a third of the buttermilk, and repeat until all ingredients are incorporated, beating after every new addition. Stir in the chocolate chips.
Distribute the batter equally among pans. Tap the sides of the pan to smooth the tops of the batter. Bake in the center of the oven for 20 to 30 minutes, until the toothpick inserted in the middle comes out clean. Let them cool in their pans until they are entirely cool, then pop them out of their pans.

Once the frosting is at room temperature, beat it until smooth and light brown, about 1 minute. Do not over stir it, you want it smooth not grainy. Spread frosting on the lowest level, then stack the next level on top. If you are using two layers, place the layer upside down so the top is flat. Frost all around and on top of the cake. It works best if you use a frosting spatula thing and not a butter knife. Be patient. It takes some time.

Thursday, April 15, 2010

Dinner! Mac and Cheese

Dinner: a revised version of this recipe.


Prep was easy. 20 minutes from start (including grating the cheese) to in the oven. My kind of weeknight recipe. The recipe, as I made it: 


Ingredients

  • 2 or so cups Dried Macaroni (the husband is sick, and a small bowl of cooked noodles went to him, with a tiny dab of butter)
  • 3 T  Butter
  • 3 T All-purpose Flour
  • 1 1/2 to 2 cups 2% Milk (it's what we had - I originally used 1 1/2 cups but added a little more right before adding the noodles because the sauce was very thick)
  • 1 teaspoon (heaping) Dry Mustard 
  • 1/2 whole Egg Beaten (the puppy does not like uncooked egg - I tried to give her some and, to give her credit, she tried it, but did not take another lick)
  • 1/2 to 3/4 pound Cheese, Grated - I used medium cheddar (my other macaroni and cheese recipe uses gouda and edam, so this was a nice change)
  • ½ teaspoons Salt, More To Taste
  • 1/8 to 1/4 teaspoon ground cayenne pepper, to taste
  • ½ teaspoons or so Ground Black Pepper, to taste
  • whatever other spices you like, I usually add ground nutmeg to my creamy cheesy dishes, I think it was about 1/8 teaspoon to this one (I don't measure, just sprinkle on top until it looks like a good amount, then taste, and add more if needed)
  • 1/2 to 1 cup chopped greens of some sort - I used broccolini because it was in the fridge

  • Preparation Instructions - these I didn't really adjust, aside from adding the green vegetable
Cook macaroni until very firm. Macaroni should be too firm to eat right out of the pot. Drain.
Preheat your oven to 350.
In a small bowl, beat egg.
In a large pot, melt butter and sprinkle in flour. Whisk together over medium-low heat. Cook mixture for five minutes, whisking constantly. Don’t let it burn.
Pour in milk, add mustard, and whisk until smooth. Cook for five minutes until very thick. Reduce heat to low.
Take 1/4 cup of the sauce and slowly pour it into beaten egg, whisking constantly to avoid cooking eggs. Whisk together till smooth.
Pour egg mixture into sauce, whisking constantly. Stir until smooth.
Add in cheese and stir to melt.
Add salts and pepper. Taste sauce and add more salt and seasoned salt as needed! DO NOT UNDERSALT.
Pour in drained, cooked macaroni and stir to combine.
Add green vegetable of choice and stir to combine.
Pour the entire mixture into a buttered baking dish, top with extra cheese, and bake for 20 to 25 minutes or until bubbly and golden on top.